Restoring a Flying Dutchman
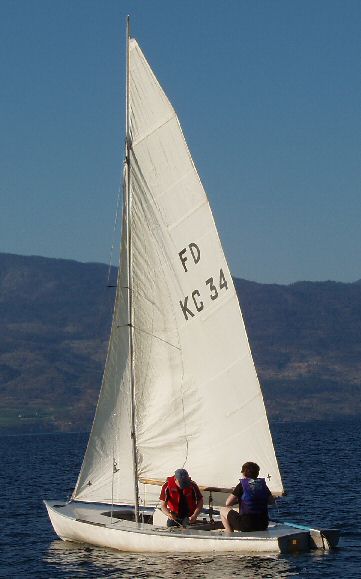
We did it! To the left you will see a picture of our Flying Dutchman sailboat actually sailing.
Although not that fast in this particular picture we have had it going a pretty good clip where we got to use the trapeze to hang out over the edge and even with that we ended up dumping wind out of the sails to slow it keep from capsizing.
It was quite an endeavor to get this boat from where it was when it joined our family to what it is today. We replaced the deck, floor, keel and then refinished the hull. The floor and hull was done by a boat builder, the deck and part of the floor was done by me. I think it turned out all right but the sad thing about it is that shortly after finishing all the work we moved to Boston and had to leave the boat behind. It is living in storage now.
If you arrived at this site, you are probably interested in the work that I did myself. Well, you are in luck. I tried to capture much of it in my online boat refinishing journal. I hope you enjoy it although as I have said elsewhere on this site, if I were to do it again, I wouldn’t. Refinishing an old boat truly is a hole in the water to dump money into. For the cost of materials and time we could have enjoyed a few years membership at a sailing club and actually been sailing instead of sanding or breathing toxic fiberglassing fumes. Live and learn.
Of course, if you do own a boat, going through a restoration process takes much of the fear out of fixing things yourself so it could save you money in the long run. Re-fiberglassing a surface or re-enforcing something on the boat is easy once you know how to fiberglass.
Removing the deck
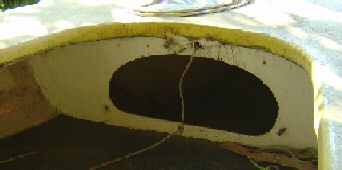
The first step in restoring our Flying Dutchman sailboat was to remove the deck. I began by cutting away a small section of the fibre glass to check the extent of the damage. Since this will be the second time that the deck has been replaced on this boat, I disovered two types of wood… the original deck wood (which I could poke my finger through) and the newer wood from the last repair job. The new wood was still strong and not damaged at all.
In spite of finding some good wood, I decided to still replace the full deck because of a bigger problem. The deck was separating from the hull. My decision was confirmed to be the right one once I started pulling the deck off. A simple knife around the edge of the hull and the whole deck peeled off! There was definately not a lot of strength left in that bond.
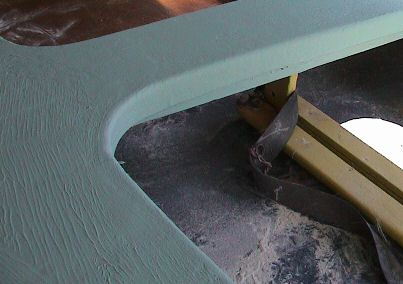
I then cleaned up the edge of the hull using a power sander… being very careful to not actually hit the original fibre glass. This left a nice surface for me to attach the new bumper that I built. (I am not sure if it is really called a bumper but that is what I call it. I am referring to the rounded edge that protects the hull from side impacts)
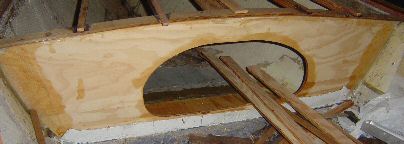
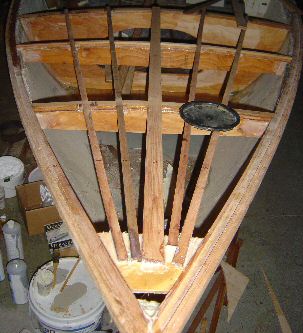
To the side of the above picture you can see the old deck. This shows off all the supports that keep the deck in its nice curved shape. I now have a huge job of rebuilding all of those supports so that the new deck is just as strong (hopefully stronger) than the old deck.

Removing the floor
The original plan was to just replace the deck… however I discovered that just like home rennovations, boat rennovations tend to spread beyond the original plan as well!
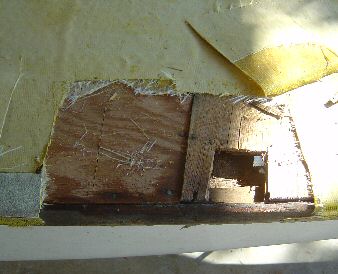
After removing the deck from the boat, I noticed that the fibre glass floor at the back of the boat was bubbling up a bit and was soft to the touch. I did not think that this was a good thing so I cut it open.
To my surprise the wood was like sawdust and it was damp! 10 years living under a tarp and there was still water trapped under the floor! Anyways, I ended up removing the back 8 feet of the floor… right up to where the center board goes through the hull.
This also exposed the “stiff” board that runs down the center of the boat to help the hull keep its shape. That board needed to be removed as well since it was completely rotted out and had separated from the hull. (Which explains why the boat hull was concave where the trailer applied pressure to the bottom)
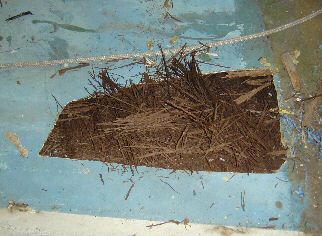
Once the floor was out, I removed the foam. There were two types of foam in the floor. A sprayed in high density foam and some lighter weight standard styrofoam.

Once I got all that out, I brushed the fibre glass to clean out all the debris. I also had to grind down the fibre glass that used to be holding the keel in place as well as remove the screws that were coming through the hull into the keel. (There was a metal strip down the center of the hull that was screwed into the keel)
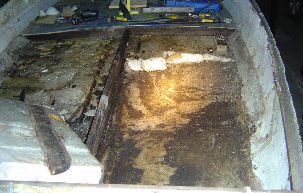
The back of the boat was now ready for a new floor to be put in.
Removing the bulkhead
By bulk head I am referring to the plywood that separates the main passenger area from under the bow.
When I removed the old one, I found that on the one side it was no longer fastened to the hull, and in a lot of places it had cracked which reduced its overall strength.
The bulk head was, however, securely fastened to the floor and when pulling it out I ended up removing another section of the floor in the bow of the boat.
That is ok, however, because it was easy to replace and made installing the new bulk head easier.
Removing the keel
Ok, I may be wrong in my terminology here. Typically the keel is below the hull, however in the Flying Dutchman the bottom of the hull is almost flat. There is a centre board that can be lowered, but I am not sure if that is also called a keel.
What I am referring to here is the stiff board running down the center of the boat on the inside of the hull.
The original board was three quarters of an inch thick and seemed to be two seperate piece of wood. The board was so decayed I could not tell if it had split or if it was always two pieces.
Removing the old keel was easy. I just lifted it up and pulled it out. That was in spite of 30 screws through the hull and into it. Even the fibreglass that was keeping it in place just fell away. There definately was no strength left in that piece of wood.
The new one that I built out of treated decking material is infinately stronger… but probably a bit heavier too.
After removing the old keel, I used my power sander to smooth out where the old fibreglass was attached to the hull. This prep’d the area for the new keel to be inserted.
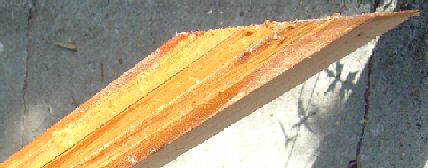
Restore the Keel
When replacing the keel I wanted to use a good solid wood that would not cost a fortune. I originally looked at teak and white oak however the folks and windsor plywood showed me some outdoor decking material that was extrememly stiff and had been treated so it would never rot.
The nice thing about that would is it was $20 a plank instead of $10 a foot.
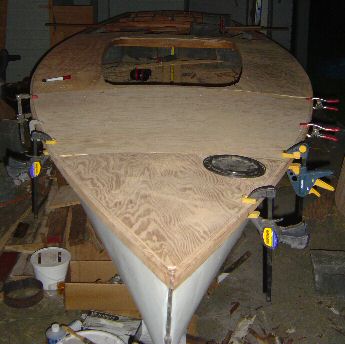
Here is the finished product (before being glassed in). Look at the dark wood in the center of the boat.
In this picture you can also see the beginnings of the framing for the deck.
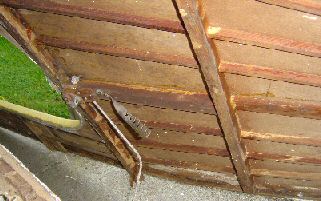
Restore the bumpers
Before I could begin framing in the deck, I needed something round the edge of the hull that I could attatch things to. It is this strip of wood that I am referring to as the bumper since it’s main purpose is to protect the hull from any side impacts.
The old bumper was built out of two square piece of lumber laminated together. (3/4″) It then had a 1″ half round piece of wood nailed to the edge to remove sharp edges.
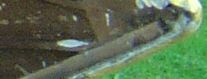
This is a very grainy picture of the front of the boat with grass behind. This project was done many years ago, before the age of high resolution cell phone cameras.
This is a close up of that same bumper.
I decided to go with a slightly different approach. I took 6 pieces of cedar and laminated them all together (using contact cement) with a slight bend in it to follow the contour of the boat. Once everything was on the boat, I then took a router to the edge to give it the round edge that the old one had.
The cedar is not as strong as the old bumper, but by adding more layers, it is pretty close to as strong, and by laminating rather than nailing the edge on, I think it gained some extra strength.
I joined the bumpers to the hull using an epoxy resin with microfibers as filler. This provided a rock hard bond and also made the laminated cedar bumper more rigid.
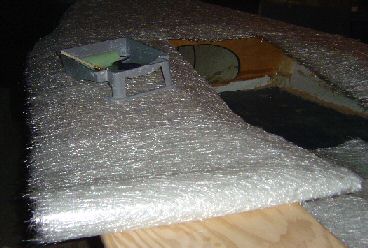
When building the bumper I made sure that on the one side there was a 1/4″ lip to accommodate the deck plywood, and the other side had an 1/8″ lip to accommidate the fiberglass hull. The result is a smooth finish that I will sand and then fibreglass.
Restore the bulkhead
As with most of the things I am replacing on this boat, I am trying to improve on the overall strength.
The old bulkhead was used for hull rigidity but was not used for deck rigidity. (It went from edge to edge but was not glassed to the deck)
My improvement was to make the bulkhead double thick (1/2″ instead of 1/4″) and then use the top of it as the main structural support for the deck at the front of the boat.
I then glassed this to the hull and too the floor as in the original design.
Overall this bulk head is significantly stronger. I did leave the access hole to be the same size as the old one. That will allow me to reuse the old door. (I am not rebuilding everything)
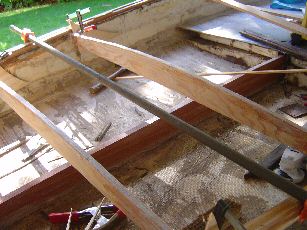
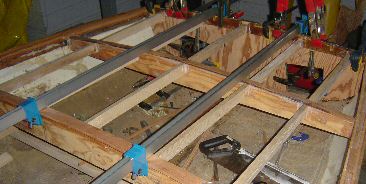
Restore the floor
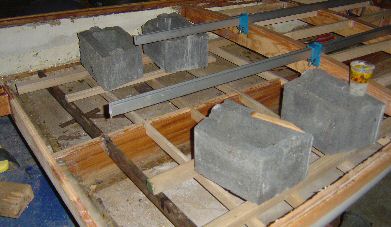
I have started on this now. The floor is now framed and ready for the expanding foam to be put in. I decided to put in more supports than the original since this will be the high traffic area of the boat.
In this picture you can see how I bent the supports. A few landscaping bricks did the trick until the resin dries.
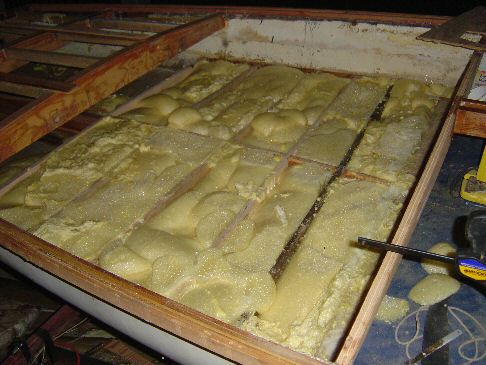
Once that was dry, I poured some polyeuthane foam into the hull. This stuff was amazing. A tiny bit would expand to fill a huge volume. I’ll do some calculations later but it really depends on how warm it is and how deep you pour it.
One thing to be aware of… it will go everywhere it can. Unfortunately some of it went under the part of the deck that I did not remove and caused it to bow up. That was a lot of work to get it out!
I was told that you could just cut off the excess when you were done. Don’t believe anyone if they tell you that. Sure.. it can be cut off but you will spend the rest of your life doing it. A very slow and tedious process.
What I found worked amazingly well was a belt sander. I had it level with the cross members in no time!
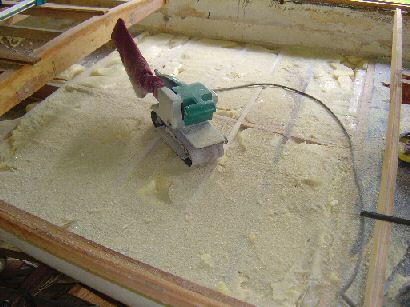
Once I had it sanded down level with the wood, I epoxied the wood and squished the plywood down onto it. I then weighed down the plywood with landscaping bricks since it is tough if not impossible to clamp the floor.
Framing the deck
As you can see from the picture of the old deck, there is a complex lattice of supports that keep the deck in place.
The reason for all these supports is that the deck is only 1/4″ plywood yet needs to support the weight of one or two adults moving around on it… sometimes even moving quickly.
For these supports I used a combination of plywood and cedar. All of the wood was thoroughly painted with epoxy resin to ensure that it never sees any moisture.
In the bow of the boat I opted to use fewer, but stronger, supports than the original. The center beam is made of the same strong wood that I used in the keel replacement. The ribs are made of 3/4″ plywood laminated with a cedar top. The reason for using a cedar topping on all of my supports is that it is easy to sand, is rot resistant, flexes well, and provides a nice wide surface to eventually laminate the 1/4″ plywood deck onto.
In the stern of the boat I used 3/4″ plywood for the main supports and a combination of cedar and plywood for the shorter joining pieces.
Again, all of the wood was coated with epoxy resin to ensure it is completely water proof.
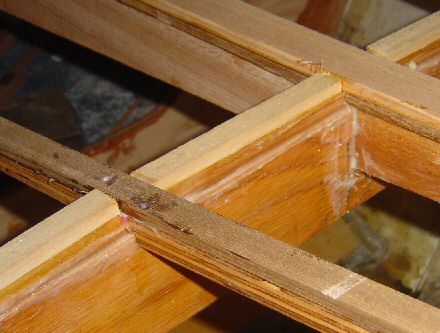
I framed the sides of the boat with a plywood/cedar laminiation. I wanted this to remain flexible so that I could get the rounded look that the original deck had. For the sharp corners I used a few thin cedar layers and laminated them with contact cement. These corners are not structural and will be heavily fibre glassed for strength.
All of the framing joints were fibre glassed to the hull and had epoxy resin reinforce the interior joints.
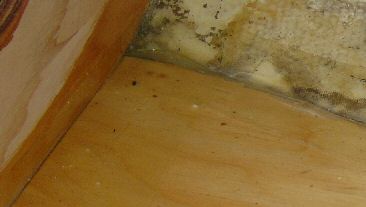
Here is a close up of one of the interior corners that I built. The nice thing about cedar is that it is very flexible.
Restore the deck
This page will describe how I cut and fastened the 1/4″ plywood to the framed skeleton. It will also describe the process of fibre glassing the deck.
Currently it does not say much because I have not yet started this phase of the project.
I have started cutting the plywood. Nothing is glued down yet because I need to do more sanding and structural fibre glassing, but with the plywood on, this is starting to look like a boat again!
The deck is complete and it is quite a long story. The plywood was epoxy resined to the edge of the boat but in the center I used contact cement because it would be very difficult to clamp it. Using contact cement I just put heavy bricks all over the deck (about 800lbs) until I was sure the cement had cured.
For fibreglassing the deck I used a heavy matting and a polyester based resin. I used the polyester resin because it is cheaper than the epoxy based resin and it will allow a gelcoat to be applied.
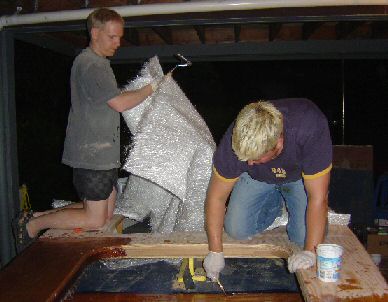
It took two of us to do this job and my friend Jason from work came out to help. One applied the resin, the other rolled out bubbles and made sure the mat bent around corners.
The finished product was pretty impressive… too bad we could not just leave it like that.
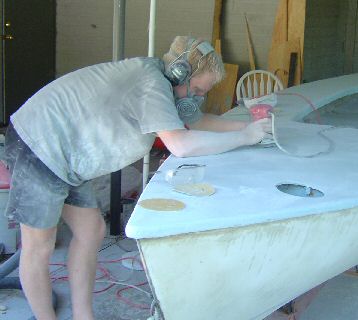
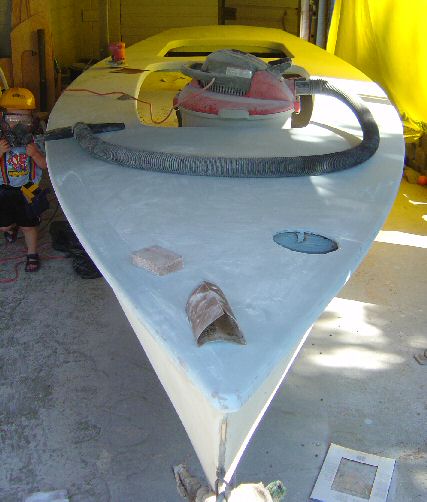
After the fibreglass had dried, I sanded off the high spots and applied a coat of gelcoat. This is where I made my first major mistake! I thought the gelcoat would go on thick so I got the fibreglass relatively smooth but not perfectly smooth. The problem is that when you sand the gelcoat, you periodically hit a high spot of fibreglass which shows up as a clear mark.

I tried to get around that by applying a second coat of gelcoat however I still had the same problem. Time for plan B since gelcoat is not cheap and I had no guarantees that a third coat would solve the problem. Also, I could see it taking MANY hours (or days) to get a decent finish with gelcoat.
Plan B was to sand the boat until it was smooth, regardless of whether I hit fiberglass or not. The gelcoat basically just acted as an expensive filler. Sanding took about 10 hours with a power sander as I kept going finer and finer with the grits.
Once I was happy with how it looked, I applied two coats of epoxy marine paint. The result was a shiny silver/gray finish that came pretty close to matching our car.
We were also much happier with this color than the baby blue gelcoat we bought. (Baby blue was the original color of the boat and it really looked dated)
Assembling the Rigging
By the time I came around to putting the rigging on it was 2 days before we were to leave on our sailing vacation. As such, I did not take many pictures… okay, I did not take any pictures so all I can do is provide a picture of what it looks like now.
I matched the rigging to as close as the original as possible. There were a few things that could have been improved on however I did not want to risk discovering why things where put where they were so I just duplicated the old rigging.
There were two exceptions. There was a rope in the front and two holes in the side deck that I did not replace since I could not see what they were for and Laura’s grandpa could not remember. If I ever need them then I can add the holes at that time.

There were two exceptions. There was a rope in the front and two holes in the side deck that I did not replace since I could not see what they were for and Laura’s grandpa could not remember. If I ever need them then I can add the holes at that time.
As of the time of writing this page, I can say we had the boat out on the Okanagan lake where it floated for a week and we sailed it at least 6 times. Everything works.
There is one problem where water appears to be getting in under the floor. Not a lot since after a week in the water the water line was not noticeably higher… but when we pulled it out of the water at the end of the vacation I could hear water under the deck.
I think it is getting in around the center board. A future project for me.
The Trailer
Normally on a boat that is really old, the trailer is equally as old. This one was no exception.
The first thing that I wanted to fix was the light mounts on the back. The old trailer had a piece of wood with wing nuts holding it on. The reason for this was to be able to remove the light assembly before backing into the water. With the light assemblies being so cheap, I decided that this was not worth the hassle. Also, I wanted to replace the center roller with two long slider boards to spread the weight of the boat out a bit. This would require a heavy duty cross beam at the back of the trailer.
The last time we were up at Williams Lake, Ben welded up a back bumper for the trailer. The thing weighed a tonne but I did not have to worry about it bending. 🙂
I fastened that to the end of the 4×4 pipe that makes up the center of the trailer. I then removed the old side supports and used two 8′ 2x4s to run from the center of the boat to the back. Once I got these at the right height, I carpeted them and put the boat back on.

One final note. While not related to the restoration project, I did pull these notes from Grandpa’s notes he took when learning to sail at UBC in the 60’s. They were a simple checklist of what to do when putting the boat away after sailing.
- With the boat on the dock, point it bow into the wind.
- Remove sail bag
- Remove bung and place it into the sail bag
- Take down the jib – leave the shackle attached to jib
- Take down the main sail Untie outhaul and down haul
- Leave shackle attached to tack
- Remove battens
- Fold sails and place in sail bag
- Wash boat with fresh water
- Tie loose ends of halyards together and secure to the mast
We no longer have this boat but I hope it is still out there somewhere being sailed.